This tutorial we will go through how to build your very own modern Porsche steering wheel found on most modern Porsches such as the 991.2, Macan, and Cayman GT4. We will build the steering wheel from the ground up and use genuine Porsche parts only and customize it to fit our personality and car.
Note: The wheel in this tutorial and video was built to fit on a Porsche 997.2, and therefore includes a process to make the multifunction switches on the steering wheel work with the car.
Tools Needed
Part List
Below is a list of part numbers used during this specific build. Please note that this is to act as a guide only, as there are several styles you can go for from the
Porsche parts bin.
Steps
Step 1: Customize the outer diameter of the wheel
This is the chance to do anything you desire to the wheel while it is out of the car and in bare format. Reupholster the wheel to your liking. In the example above we applied yellow vinyl to act as a center mark, applied lacquer to the carbon bits to integrate the center mark into the wheel. We then chose perforated leather with yellow stitching for the side grips.
Step 2: Wire Harness

Simply clip in the wire harness as displayed above, making sure the wiring is routed properly into the allocated guides.
Step 2b: [Optional]
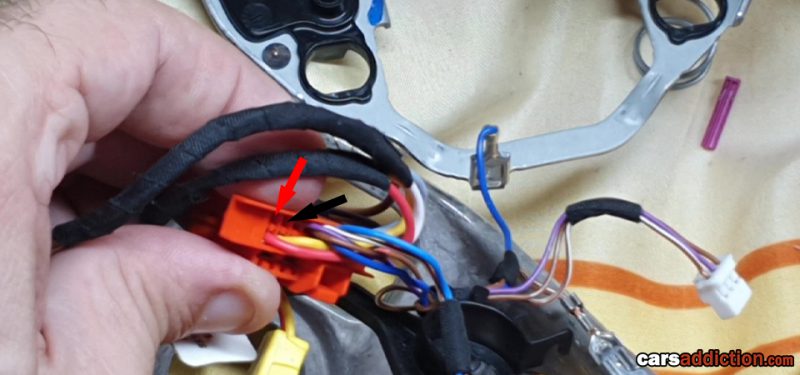
Use the provided 2 wire harness supplied with the GPS adapter kit and insert the Red and Black wires to Pin 11 and 12 respectively in the highlighted area. Refer to the video (link below) for a demonstration of how to reveal the back of the orange plug.
Step 3: Install Back Plate
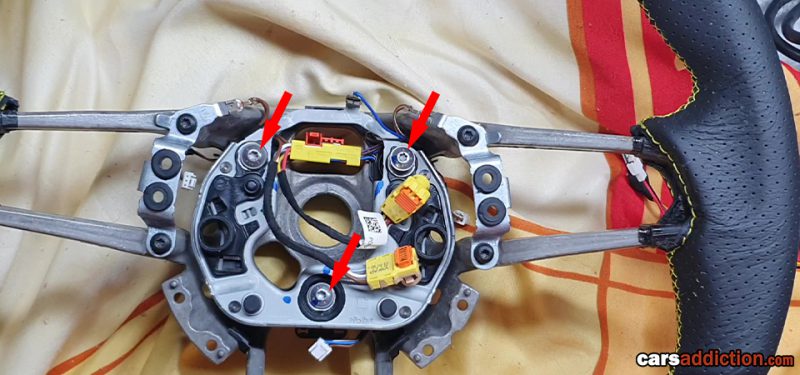
After the wire harness is in place, place the 3 springs in the allocated slots and place the plate on top. Use the 3 provided sleeve and bolt with a torx t20 bit to fix into place.
Note: Please contact us if you know the part number for the plate, sleeve, and bolts. These parts were included with our donor wheel.
Step 4: Prepare the Fascia
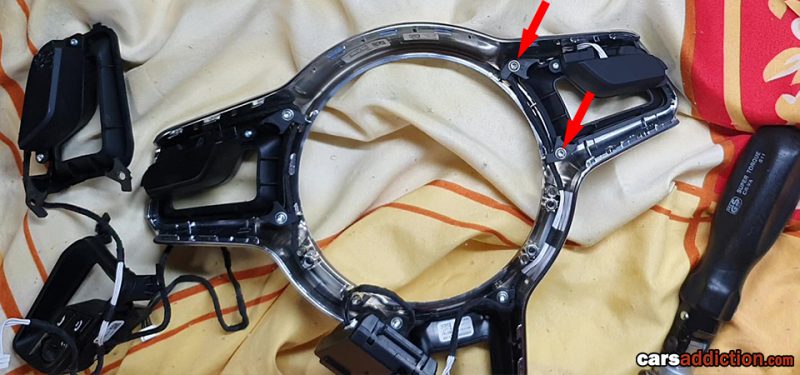
Each switch and trim is held in by two T10 Torx bolts and secures into place on the outer edge. Make sure the wiring is passed through the appropriate channels.
Note: At this step you can decide to go with or without a multifunction steering wheel, depending on the parts you have.
Step 5: Install Fascia and Control Unit
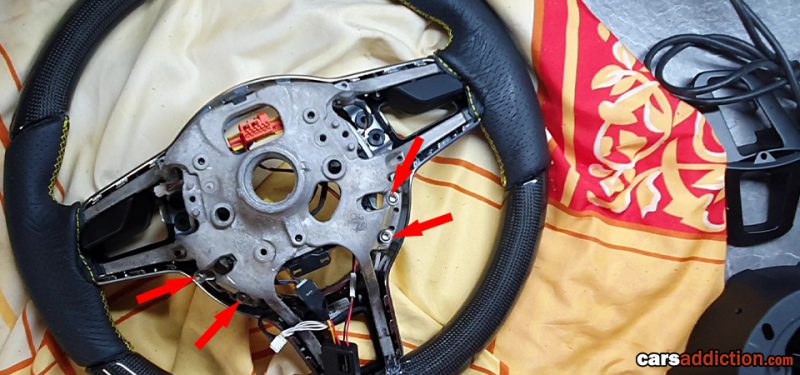
The front fascia is secured by four long T20 torx bolts. Clip in the control unit into place and if doing the 997 retrofit plug in the GPS Adapter accordingly (all wires only go in one direction, so it's hard to mix them up)
Step 6: Rear Cover and trims
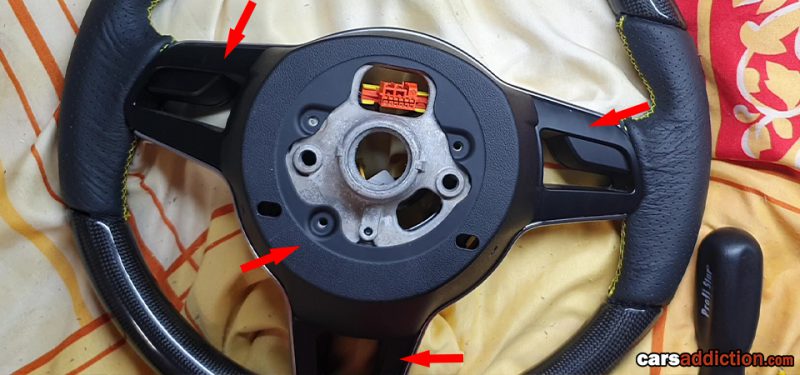
First clip-on the three rear trims into place. Then slide the rear cover and secure it into place with three T20 Torx bolts. If doing the 997 retrofit, secure the adapter in place with the provided felt tab.
Step 7: Airbag
This step can be done when installed on the car where you would connect the 2 round connectors to the back of the airbag and push the airbag into place. Note the airbag easily comes off by pushing the release through the small holes on the back cover.
All done!
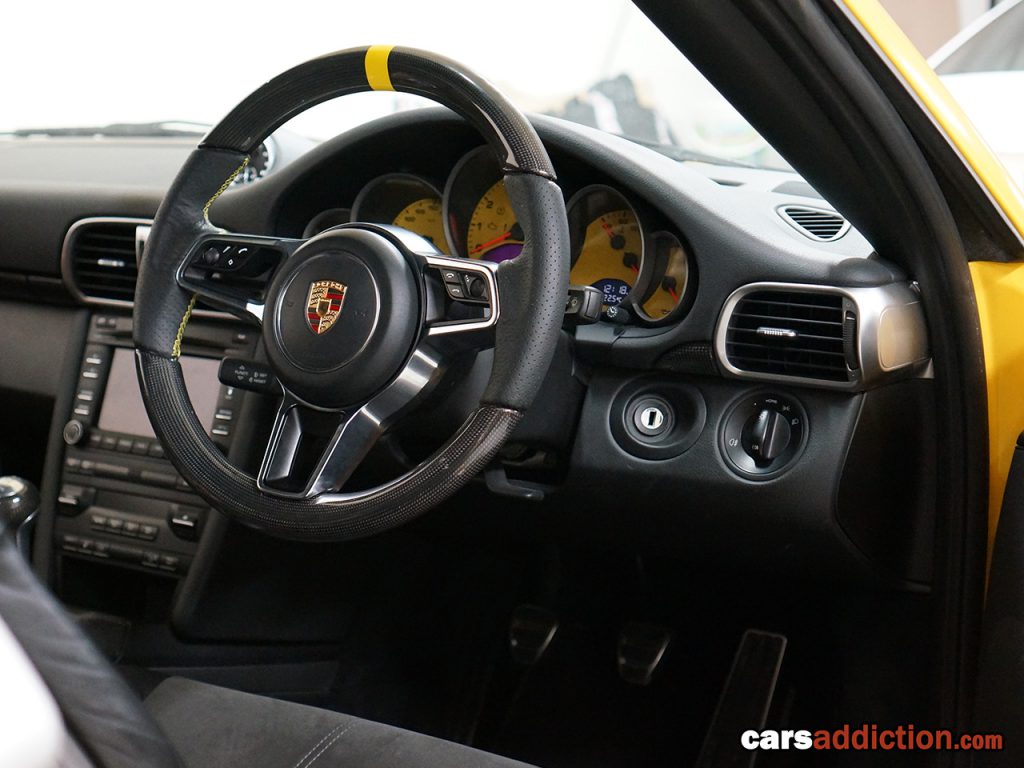
You are ready to install your new wheel in the car! We will cover the installation and programming of the wheel in another article. In the meantime, check out our video on the above process, and if not already please do subscribe to our YouTube channel.
Use code carsaddiction for 20% off!